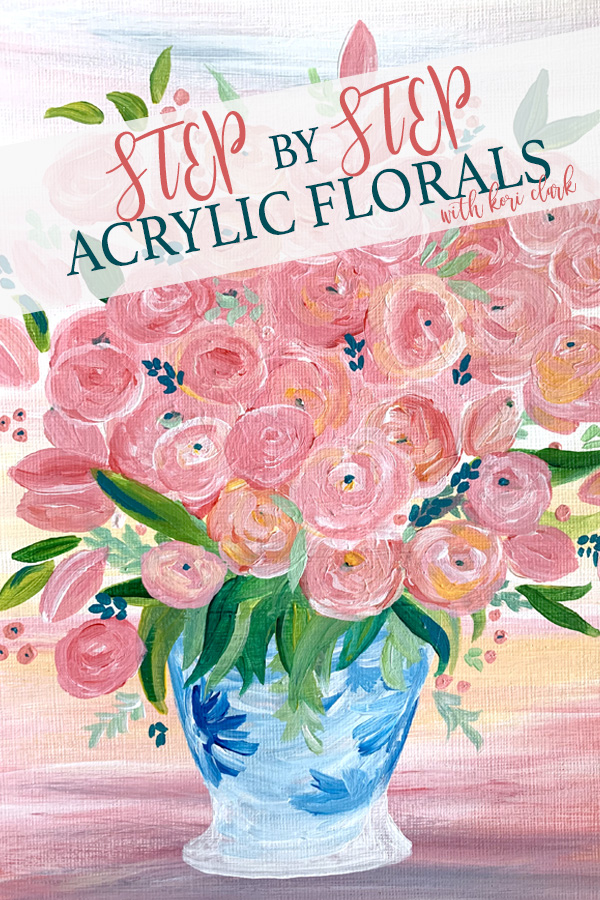
The weather has been so perfect here in Florida and it certainly feels as if spring has sprung! The warmth and sunshine has had me painting more florals just for fun so I thought I would share a quick step by step in case you’d like to try one at home.
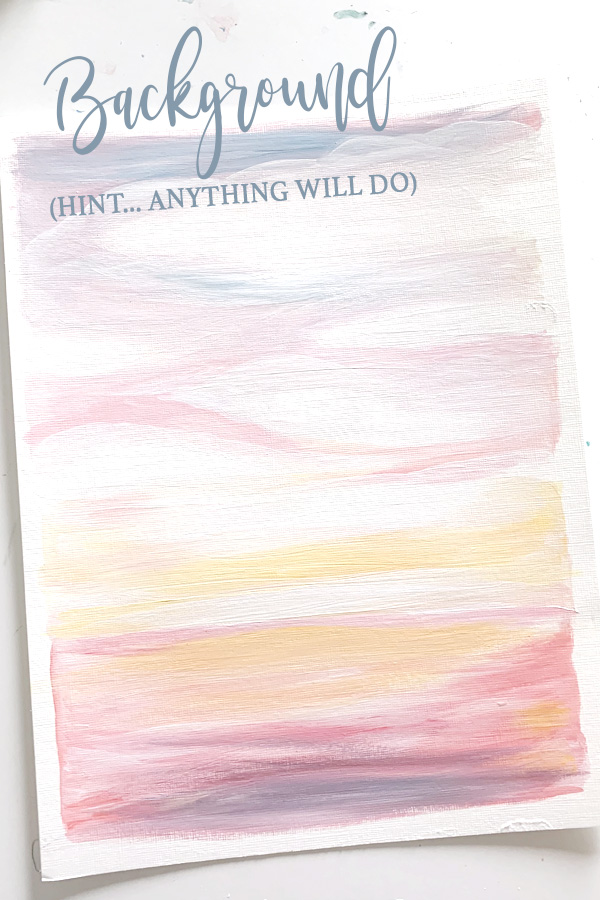
First things first, all you need is some simple acrylic paint and a canvas or acrylic paper. I used white and mixed it with blues, reds, yellows, and greens to get my colors here. I also started with a paper that I previously painted and didn’t love, but you can paint a solid background or a gradient background and let that dry before painting.
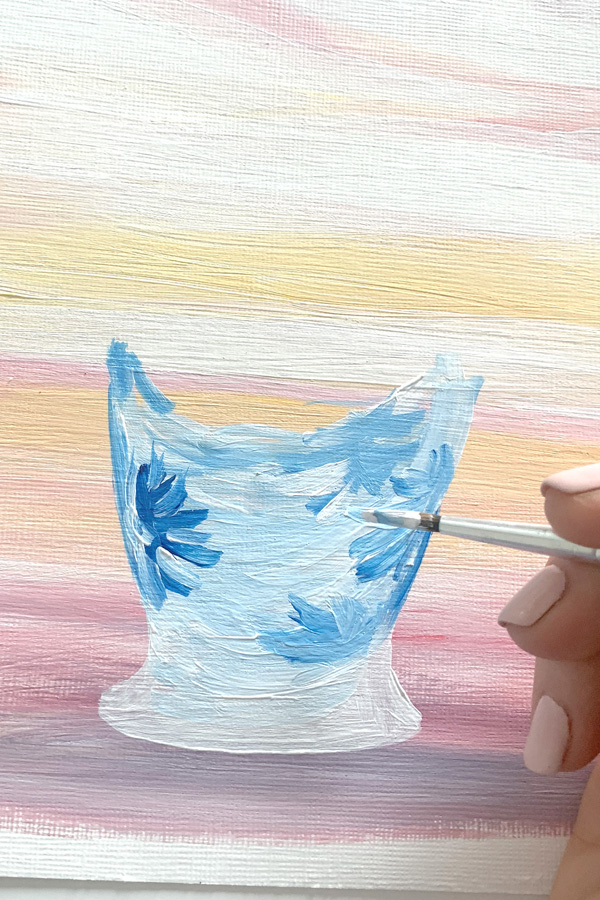
First things first, I painted the vase. I only went about halfway up and used mainly white (heavy bodied acrylic which is thicker!) working up with arched downward strokes of the brush. Once I had the basic shape, I went back with a richer blue and added a few “petals” of a sort to mimic a pattern on the vase.
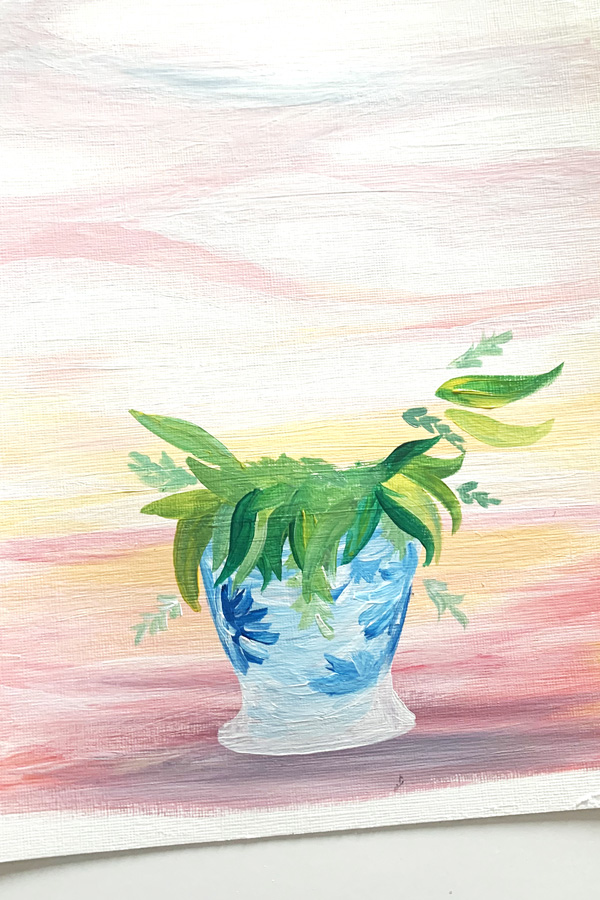
Since you only paint the vase about halfway up, you can simply start layering leaves and foliage over it. Just think of making the shape in a variety of sizes and colors (ie some white and a little green, some green and yellow, some white green and yellow).
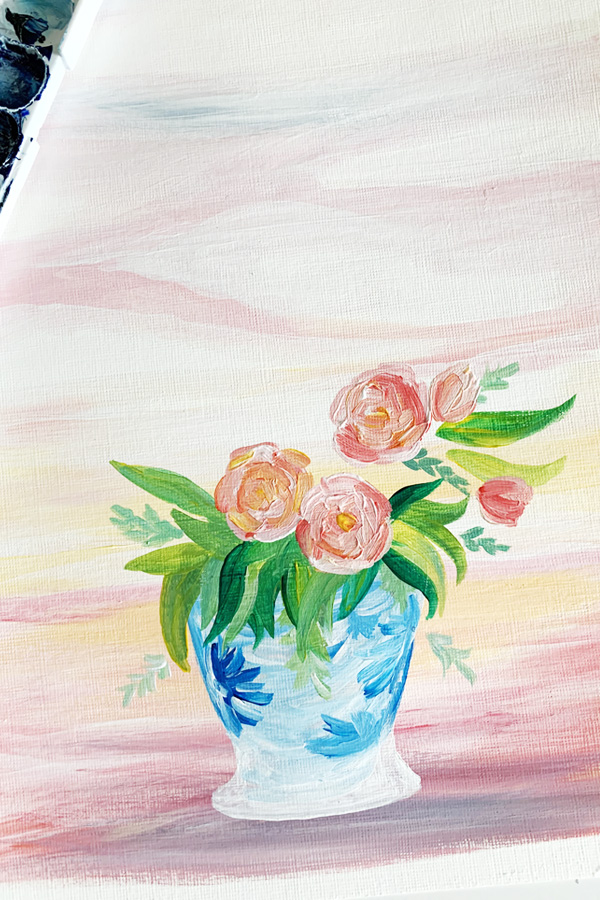
Now for the fun part, flowers! I just started adding florals and working my way up with them. For a more up close video on how to paint the flowers themselves, I have it saved in my IG Stories for you! CLICK HERE TO VIEW.
Now keep adding florals and leaves…

and then…. TA DA!

If you give this a shot, I would LOVE to see how it turns out! I know it’s a little bit upside down out there right now, but maybe if we can find a way to just keep calm and paint… Happy Thursday y’all!
xoxo
Kori